Making Eon: Effects Part 1
Introduction
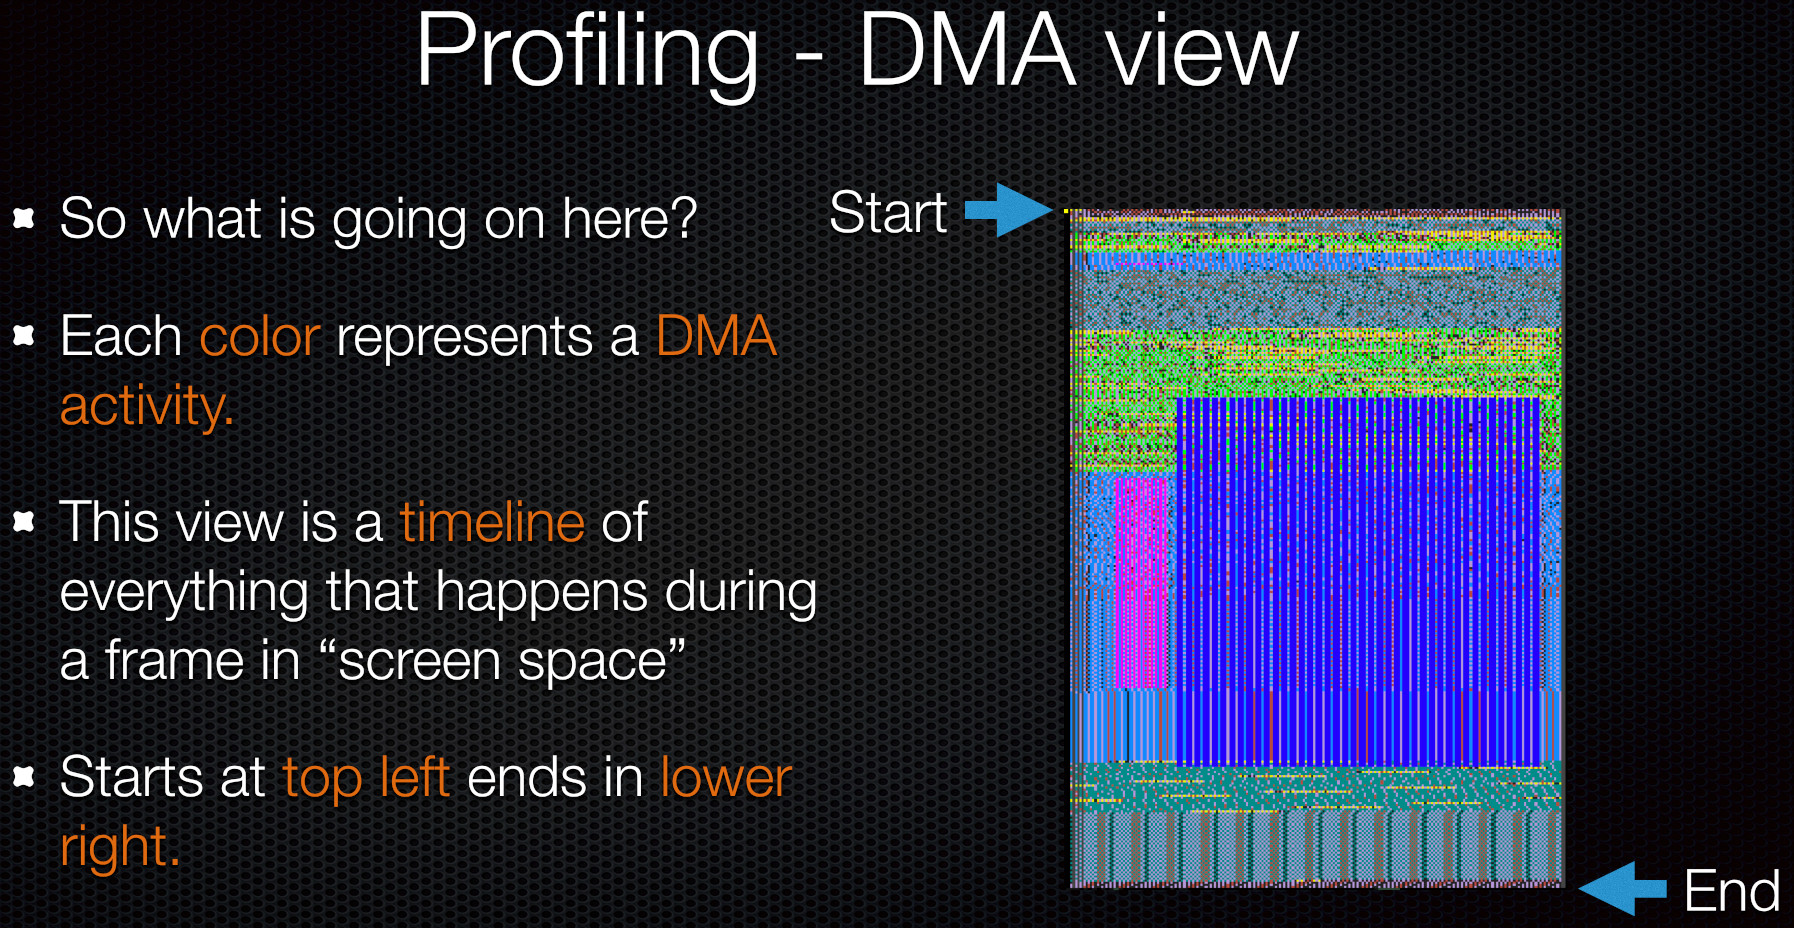
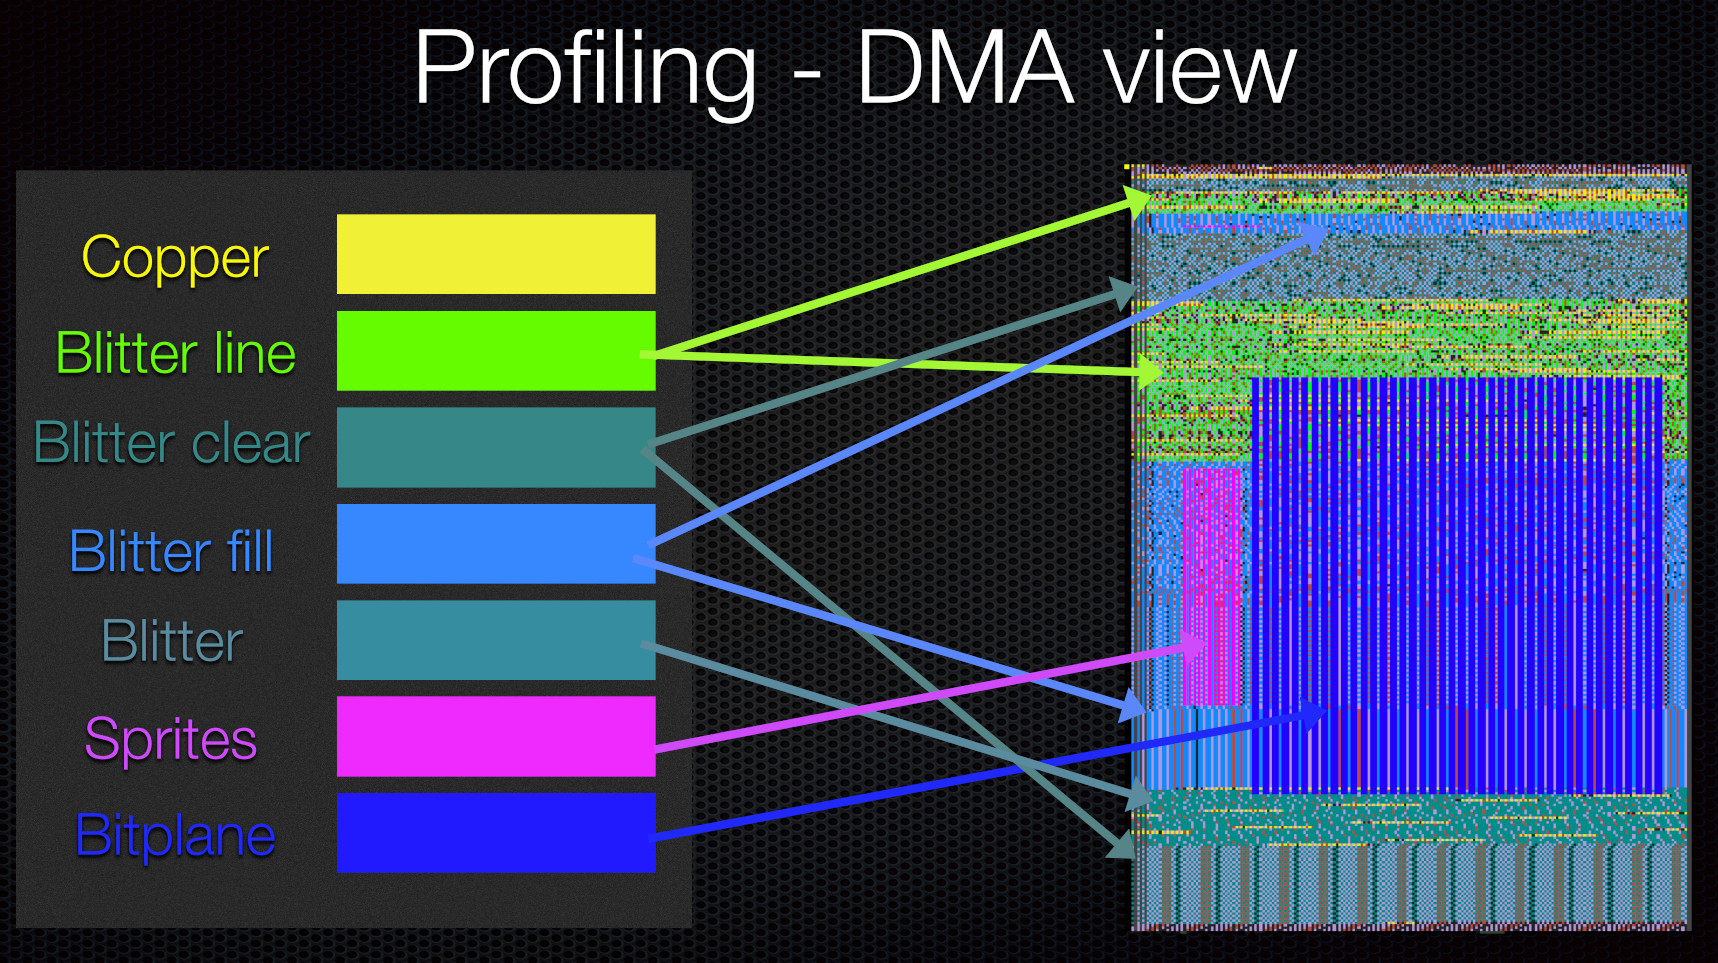
Over several posts I will go into detail about the various parts in the demo. Some of them I will dive into more detail while some of them I will refer to earlier posts when it makes sense. Before starting something I will use quite a bit when talking about performance of each part is something that is present in UAE which is the DMA view and as I will refer to this view quite a bit I want to intorduce it here first.
![]()
This view is availible in FS/WinUAE by entering the debugger and typing v -2 and you will get this view on the top side of your screen. I made some images here to try to describe what is going on.
TBL Logo
To start of with we have the “classic” TBL logo as can be seen here.
The way the A1200 version worked was to have 40 images of 160x160 loaded to memory so they take ~1MB of memory which wouldn’t work on an A500 that has much tighter memory constrains. What I instead did is to write a tool that scan each image and finds the starting and ending segments on each line and store only that. One frame when just plotting these positions looks like this
![]()
The way the data is layerd out is that I have as separate stream of the amount of “segments” for each line in a separate array. The reason to separate the data is that it allows for better compression as the numbers are repeating more. Then for each line (that has some data) I have a pair of two bytes for starting and ending positions. This brings the data needed from the full frames of 1MB to ~22KB (and 17K compressed on disk) It would likely be possible to bring this down even further by delta steps instead but this was good enough.
At the start of the effect I plot these dots using the CPU and then I have the Blitter filling the outline. In order to have as much CPU time as possible I pre-render all of the frames into 40 frames of one bitplane buffer. This way I only need to use the CPU once to plot the outline and during the part I can just rotate between the frames.
“Motion Blur”
The A1200 version of this effect blends frames with the CPU by using chunky to planar This would be too slow to do on the A500 (esp when we want to leave as much CPU time availible as possible for the loading). So instead I use a “classic” trick of doing motion blur on Amiga which is pretty much free (disregarding the extra DMA time needed for bitplanes) and that is to use 4 bitplanes instead of one 1 and set up the palette in such way that the bitplanes will “blend” with each other. The way this works is that all frames are already generated so far example on frame N.
On N:

Bitplane 3 = Frame 4
Bitplane 2 = Frame 3
Bitplane 1 = Frame 2
Bitplane 0 = Frame 1

On N+1

Bitplane 3 = Frame 5
Bitplane 2 = Frame 4
Bitplane 1 = Frame 3
Bitplane 0 = Frame 2
As each bitplane with lower values has darker colors you get a “motion blur” like effect as the previous frame is shown darker and we have 4 frames of motion blur here. Now real motion blur of course doesn’t work like this as you take the steps in between frames but the effect helps quite a bit by removing the otherwise harder look. See this video for a comparison. With the non-motion blurred version of the left and the original on the right.
Glitching
There is a Glitch effect that happens now on then on the logo. The idea was to use this in more places in the demo but it turned out to be quite hard to get working many parts as in many cases we use the Copper to drive the Blitter to have as little stalls as possible on the CPU side. The glitching is done by a combination Blitter copies and Copper scrolling per line. Initially Calladin made a ref in After Effects and I manually looked at each frame and tried to re-create something similar.
First thing a bunch of frames gets slightly shifted with the Blitter and the palette is changd in order to apply the magenta / purple color shift. As the effect usually happens in x directly the blitter has to be used to apply this shift. If the shift would only have happened in y direction it would have been easier as only bitplane pointers would have been needed to change. I construct a number of GlitchOp tables that gets applied each frame for a total of 8 different glitch frames. A definition of frame can look like this:
static GlitchOp s_frame_4_ops[] = {
	{ .op.scroll = { 80, 0, 0, 0 }, .type = GlitchType_Scroll },
	{ .op.scroll = { 1, 7, 0, (GLITCH_WIDTH / 8)*85 }, .type = GlitchType_Scroll },
	{ .op.scroll = { 1, 8, 0, (GLITCH_WIDTH / 8)*90 }, .type = GlitchType_Scroll },
	{ .op.scroll = { 1, 1, 0, (GLITCH_WIDTH / 8)*95 }, .type = GlitchType_Scroll },
	{ .op.scroll = { 10, 0, 3, (GLITCH_WIDTH / 8)*99 }, .type = GlitchType_Scroll },
	{ .type = GlitchType_End },
};
Misc
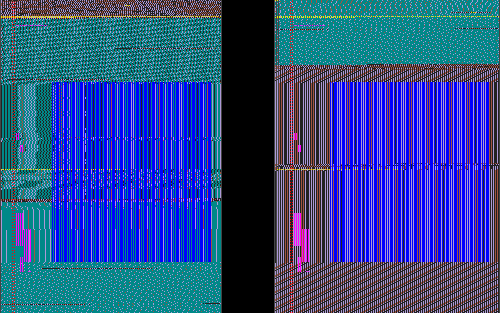
The rest of the effect is straightforward. As seen in the DMA view here
![]()
There are 3 copper “splits” in total with one sprite for the middle dot in the center of the rotating thing. The splits are here so the colors for the dots and the text can be changed independently (faded up/down etc)
Mobile Intro
The mobile intro part is simple.
The part runs in 5 bitplanes where the background is 16 colors and the foreground is also 16 colors. As we want the hand to have a larger size than 64 pixels it has to be rendered using the Blitter. The Blitter pass is quite heavy as it needs to do the worste case “cookie-cut” style operation with masking against a background and have several sources so this means that the part will run in 2 frames (25 fps) but it’s ok for this case.
Here are two frames with the DMA activity. Sprites are also used for the blinking dots and the animated phone icon. As the sprites share the same colors as the foreground image some extra work had to be done to ensure that these colors work work with both the sprites and the background.
The palette flickering (which is used quite a bit in the demo) is done using Perlin Noise which is in this case is a 1D table generated offline with 64 entries that just gets picked in a repeating order.